I recently created a post sharing tips for creating cheap video poems and realized the tools used are also perfect for creating B2B marketing videos (and have in fact been used by me for that purpose too). So you can find below a step-by-step guide to my three favourites.
1. Lumen5
Lumen5 is free and very easy to use. The basic idea of Lumen5 is that it's a simple way to create a video-version of your blog posts, using AI to suggest relevant images to match your content.
Step 1: Insert a blog URL.
Step 2: Select the text you want included and edit the text in the order you want it to appear in. You can also type in new text line by line. Don't worry too much about it being set in stone as you can edit this later.
Step 3: Lumen5 will generate 'scenes' for you. This is what the page will look like:

On the right are your 'scenes'. On the left are suggested images and videos. You simply drag the image you want to the relevant scene.
(Note: you can also upload your own images and short footage)
You can use the same footage for several lines by pressing 'Enter' on the text to separate it into two boxes. See below:

Step 4: Once you're happy with your scenes, go to 'Music' on the left-hand side to select a soundtrack, and 'Branding' to edit the call to action at the end of the video (i.e visit my website/check out our blog etc). Your logo can appear as a watermark on all your slides if you wish.
Step 5: Then click 'Continue' on top right to see how your scenes all work together, and then wait for the video to render (this usually takes about 10 minutes). You can always re-edit later or, if you're happy, download it and share it!
Pros: It's free (there are some paying options). You can easily add text, and choose from a gorgeous library of video footage, images and icons. Because options for where text go are restricted, it's hard to bungle this one up. You can now add black stripes above and below for a meme effect or a reminder of the book's title.
Cons: you can't add your own audio track, you can't control the speed at which the transitions happen, and sometimes footage/images go missing in the rendering (the latter is probably just a bug that'll hopefully get fixed though!). However, Lumen5 are constantly improving their software, so I have high hopes for its evolution.
Good for: Advertising events, giving a taster of your blog posts.
You can see a live example here.
If you've got great footage already and just want to add text to it, then Typito is perfect. It has all sorts of animation options for your text.
Step 1: Upload your footage
Step 2: Click on 'Switch to Reel Mode' on the right. This is where you can edit the length of the footage and upload and add any additional footage.

Step 3: 'Switch to Overlay Mode' to add text. In the left-hand column you are given various options which you can add by clicking on them. When text is highlighted, you can see on the timeline below when they appear and adjust the length of time they're there for by just dragging the edges with your mouse.

Step 4: You can edit the animations for the text (i.e how they arrive on the screen, and how they exit), as well as the usual font, size, colour etc.
Step 5: Click 'Export' and you're done
Pros: Really easy to use with some nice text options, particularly for animations. It's also easy to choose a different size option if you want it to be well adapted to, say, Instagram. Videos are either free or a $3 per video depending on the option you choose, so it's very affordable.
Cons: you can't edit or add any audio to this, so you have to make sure that's already perfect before you input it. There are no editing options for the footage beyond length - you can't crop it or position it differently.
Good for: Adding subtitles to a video of you talking, such as for LinkedIn videos.
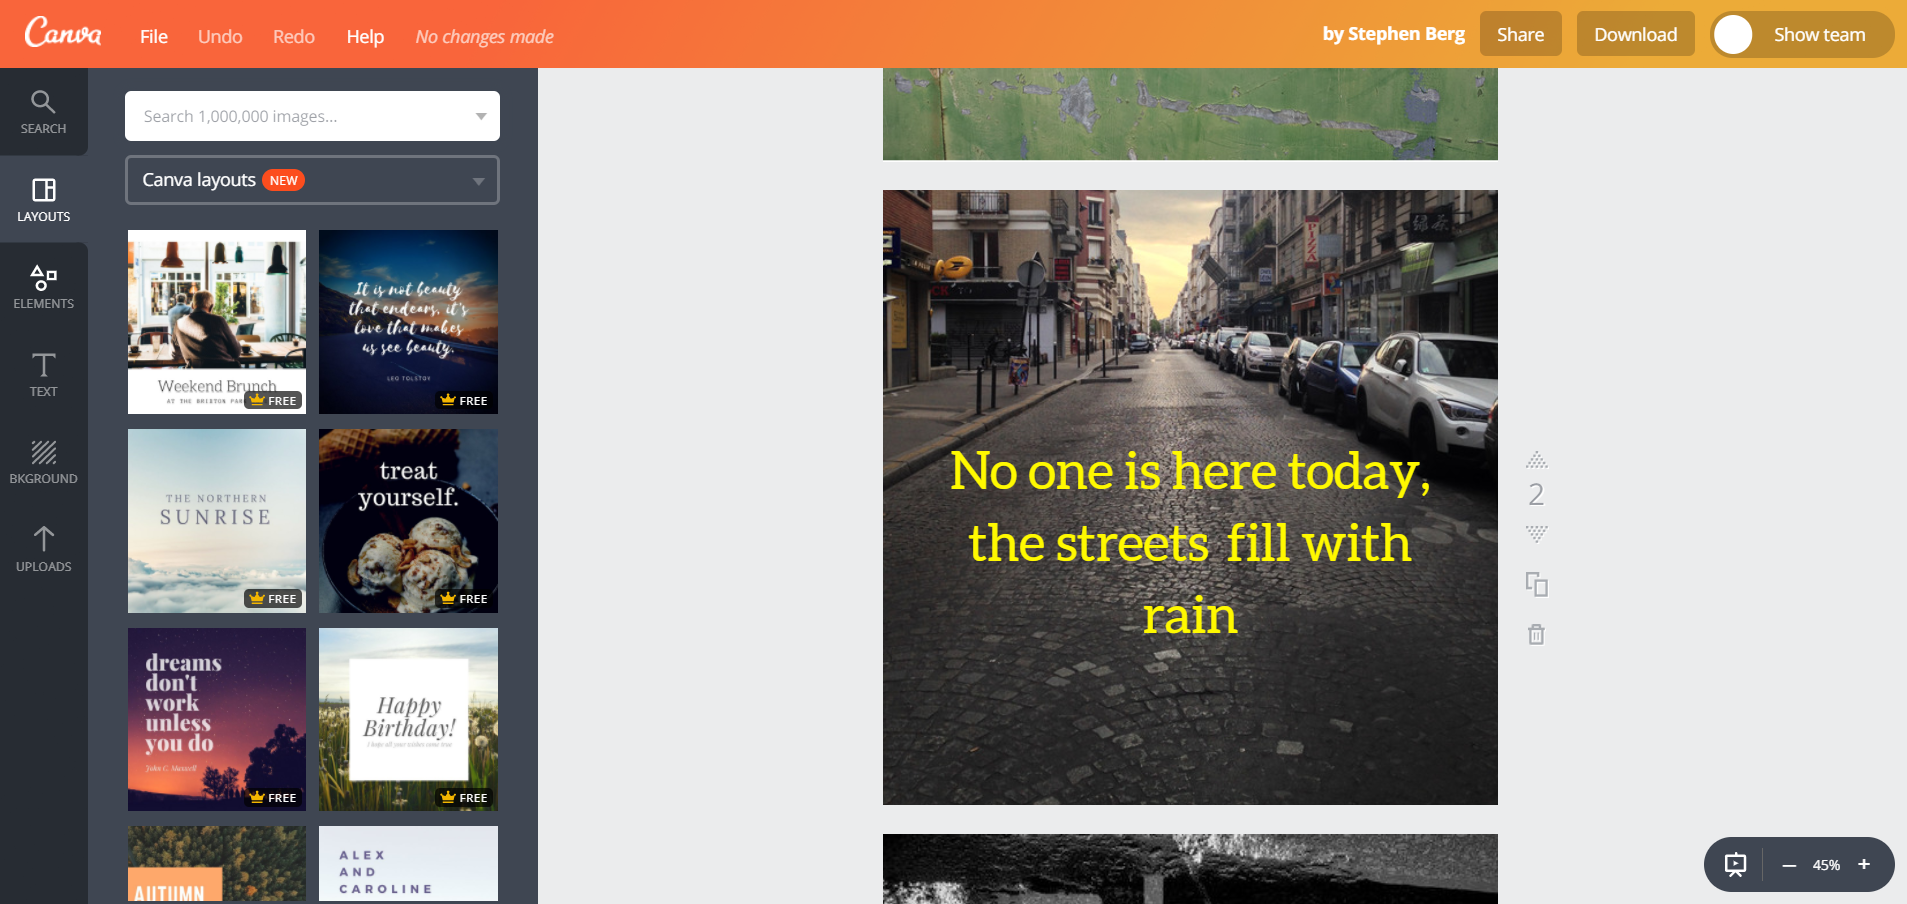
Canva is a fantastic image editing tool and it also has an option to create GIFs out of your designs. The only caveat is that this option is currently only available to Canva for Work users ($9/$12 a month).
Step 1: Log into Canva and select the format you want to create your GIF in (for example: an Instagram size).
Step 2: Create images, one per line ideally, by choosing images from Canva's extensive library or uploading your own. Add and edit text. Bear in mind that you can go up to 10 images maximum and that filters won't transfer. So keep it simple.
Step 3: Save your project, then click Download and select 'Animated GIF' as the file option.
Step 4: Select the animation style from a variety of options then download it as a GIF or movie depending on the option that best suits you.
Pros: Quick and easy to use. Good for Instagram or teasers. You can ensure it's the perfect size format and easily translate it into other formats too (so you can have a GIF version of the same, but in a size that's perfect for Twitter for instance!)
Cons: No sound options, you can't filter the images or control the animations. Might be pricier for some people to access.
Good for: Giving a teaser for your event or blog post, advertising your services in a quirky way, short tips, ...
Conclusion
These options are great if you need something quick and cheap, let me know how you get on with them!

/Passle/53d0c8edb00e7e0540c9b34b/MediaLibrary/Images/60d45d29400fb313e81c0233/2023-12-06-15-47-43-114-6570979f2d7dba95536fcf7c.jpg)
/Passle/53d0c8edb00e7e0540c9b34b/MediaLibrary/Images/2024-04-23-10-46-55-202-6627919fe87bcfeefc964b71.jpg)
/Passle/53d0c8edb00e7e0540c9b34b/SearchServiceImages/2024-04-17-17-49-35-271-66200baf326ad244c0db9ae4.jpg)
/Passle/53d0c8edb00e7e0540c9b34b/MediaLibrary/Images/2024-04-10-11-29-07-077-66167803221599fb7faeeed7.jpg)
/Passle/53d0c8edb00e7e0540c9b34b/MediaLibrary/Images/2024-04-09-17-47-13-241-66157f21e03ff7b7beb313ca.jpg)